How to Import Pie Calendar Events
Pie Calendar doesn't have a native import tool, so you'll have to use a third party import plugin. Since Pie Calendar events are posts in the WordPress database, almost any import plugin should work, but we'll focus on WP All Import for this tutorial.
Preparing your import file
Below are the fields you'll want in your import file, although they're all optional outside of the event title.
- Event Title
- Event Description
- Show On Calendar ("Yes" or "No")
- All Day Event ("Yes" or "No")
- Start Date
- End Date
- Event Color (HEX code for the color of the event)
- Text Color (HEX code for the color of the event text)
For the dates, you'll need to use a date format that's compatible with PHP's strtotime() function. Usually any human-readable date will work, but PHP can get confused if you use "/" as the date delimiter and the dates are listed in European format (d-m-Y).
For example, "31/12/2021" won't work because PHP assumes American format (d/m/Y) when slashes are used. You will have to change "/" to "." or "-" to make it work. If you can't edit your import file, you can use an inline PHP function to change it on the fly (replace {date[1]} with your import element if it's different):
[str_replace("/",".",{date[1]})]
For the colors, you can use a tool like RedKetchup to find the HEX codes for the colors you want to use.
Here is a working example file that you can use for this tutorial >>
Required Plugins
For this tutorial, we're using the following plugins:
- ACF - https://wordpress.org/plugins/advanced-custom-fields/.
- WP All Import - https://wordpress.org/plugins/wp-all-import/.
- PieCalendar WP All Import Add-On - Download link >>.
We'll use ACF to create a custom post type named "Movies on the Lawn" with the slug "movie-on-the-lawn" for our events, and then use WP All Import and PieCalendar's Add-On to import the events into that post type.
Step 1 - New Import
Go to All Import › New Import, click "Upload a file", then upload the "EventsExample" example file. Once it's uploaded, select the post type you want to import the events into (Movies on the Lawn):
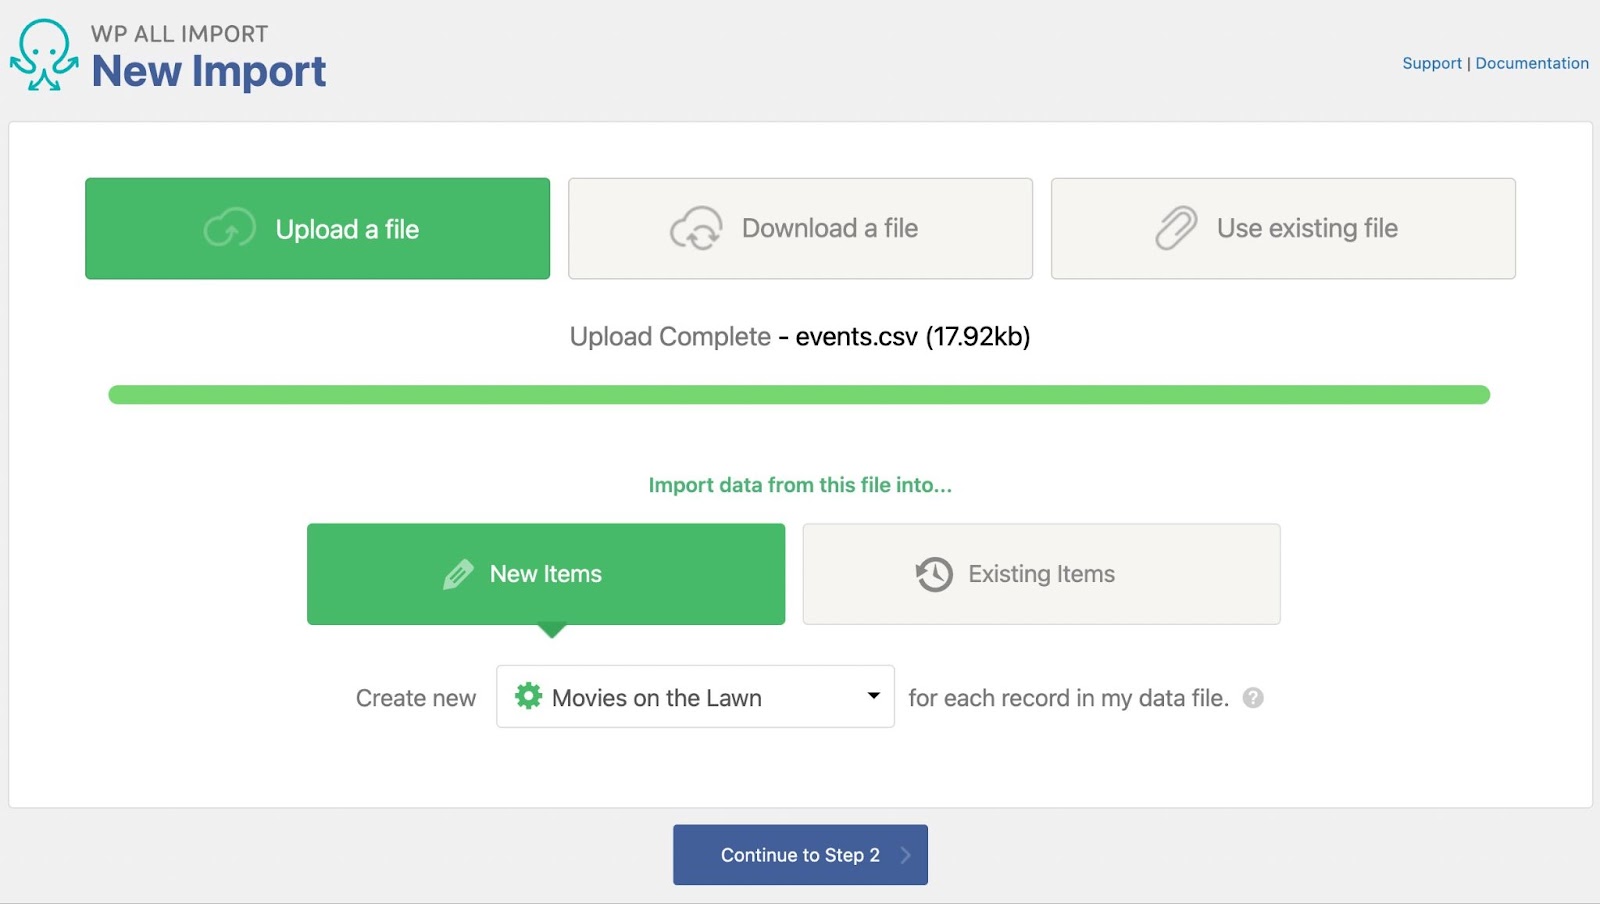
Now, click "Continue to Step 2".
Step 2 - Filtering and Other Settings
On step 2 you can add a filter to only import events that meet certain criteria, change the delimiter, or select the main element that you're importing (with certain feeds). With the example file we're using, you don't have to do anything, so we can continue to step 3:

Step 3 - The Import Template
This is where we map the fields from our file into WordPress fields inside the import template. First, drag and drop the title and description elements into the Title and Content fields:
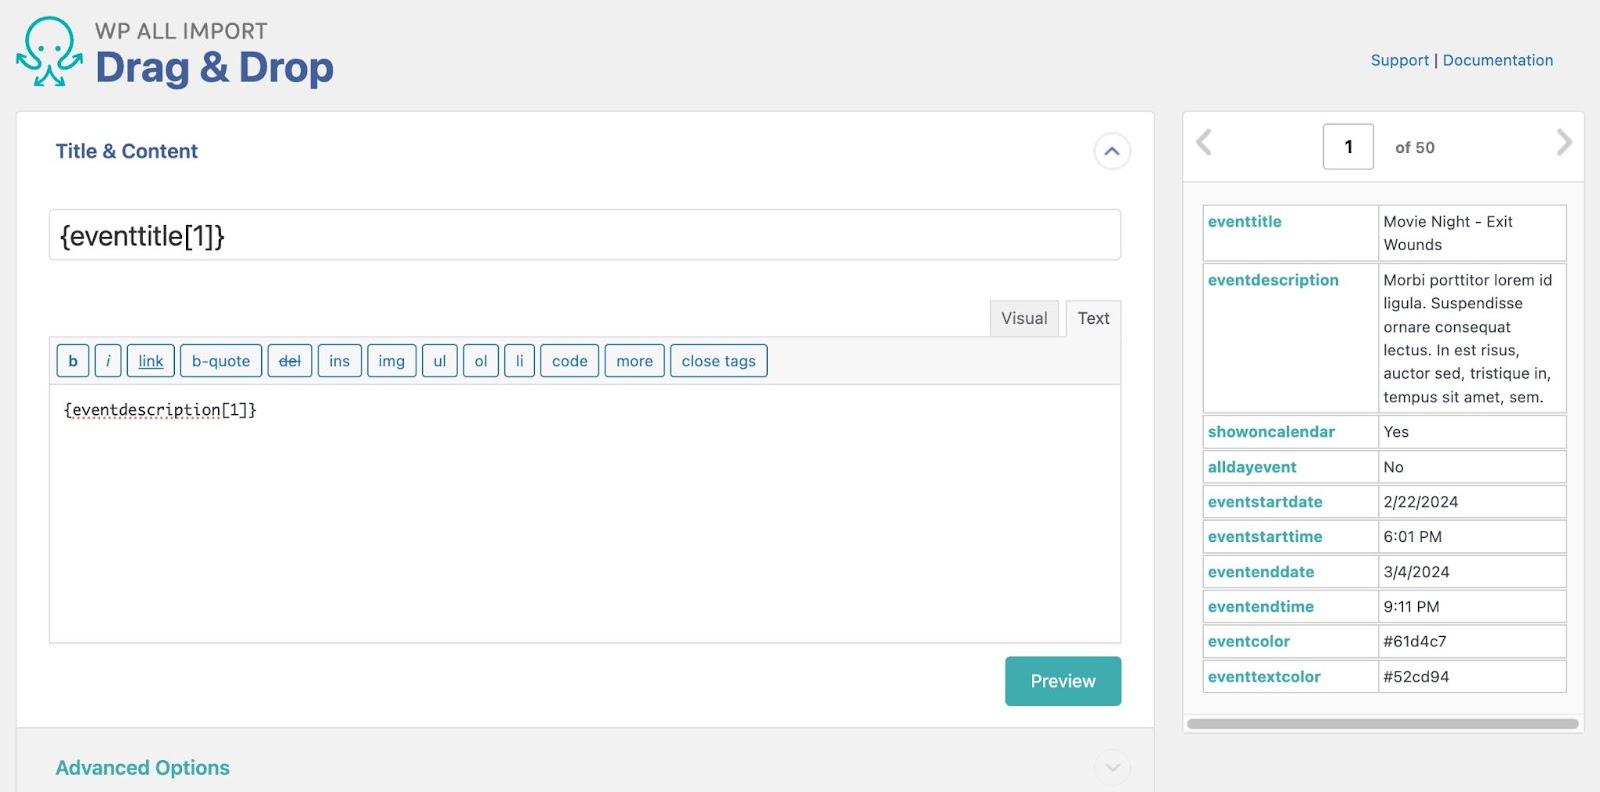
Next, we'll open the "Pie Calendar Add-On" section and map the fields from our file to the event fields:
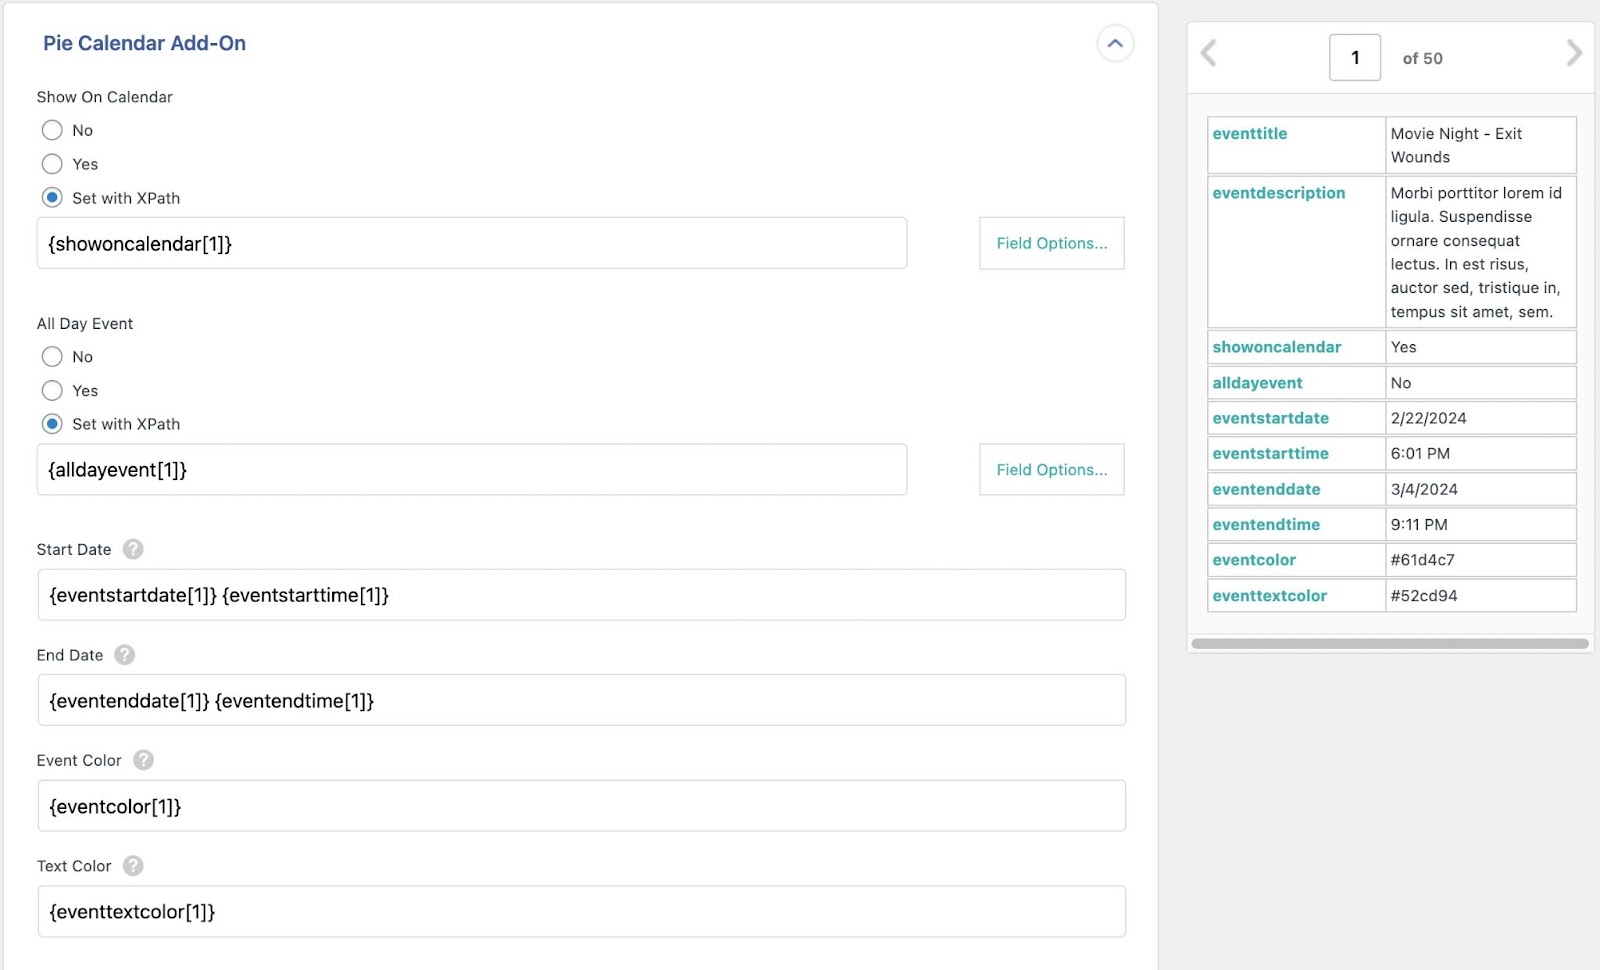
That's all we need to do for this example. Click the continue to step 4 button at the bottom of the page.
Step 4 - Import Settings
First, we need to define the Unique Identifier. This should be an import element, or a combination of elements, that contain unique data for each record that will not change when the import file is updated. The event title's in this example are unique in each row, and they won't change in the future, so we'll use that:
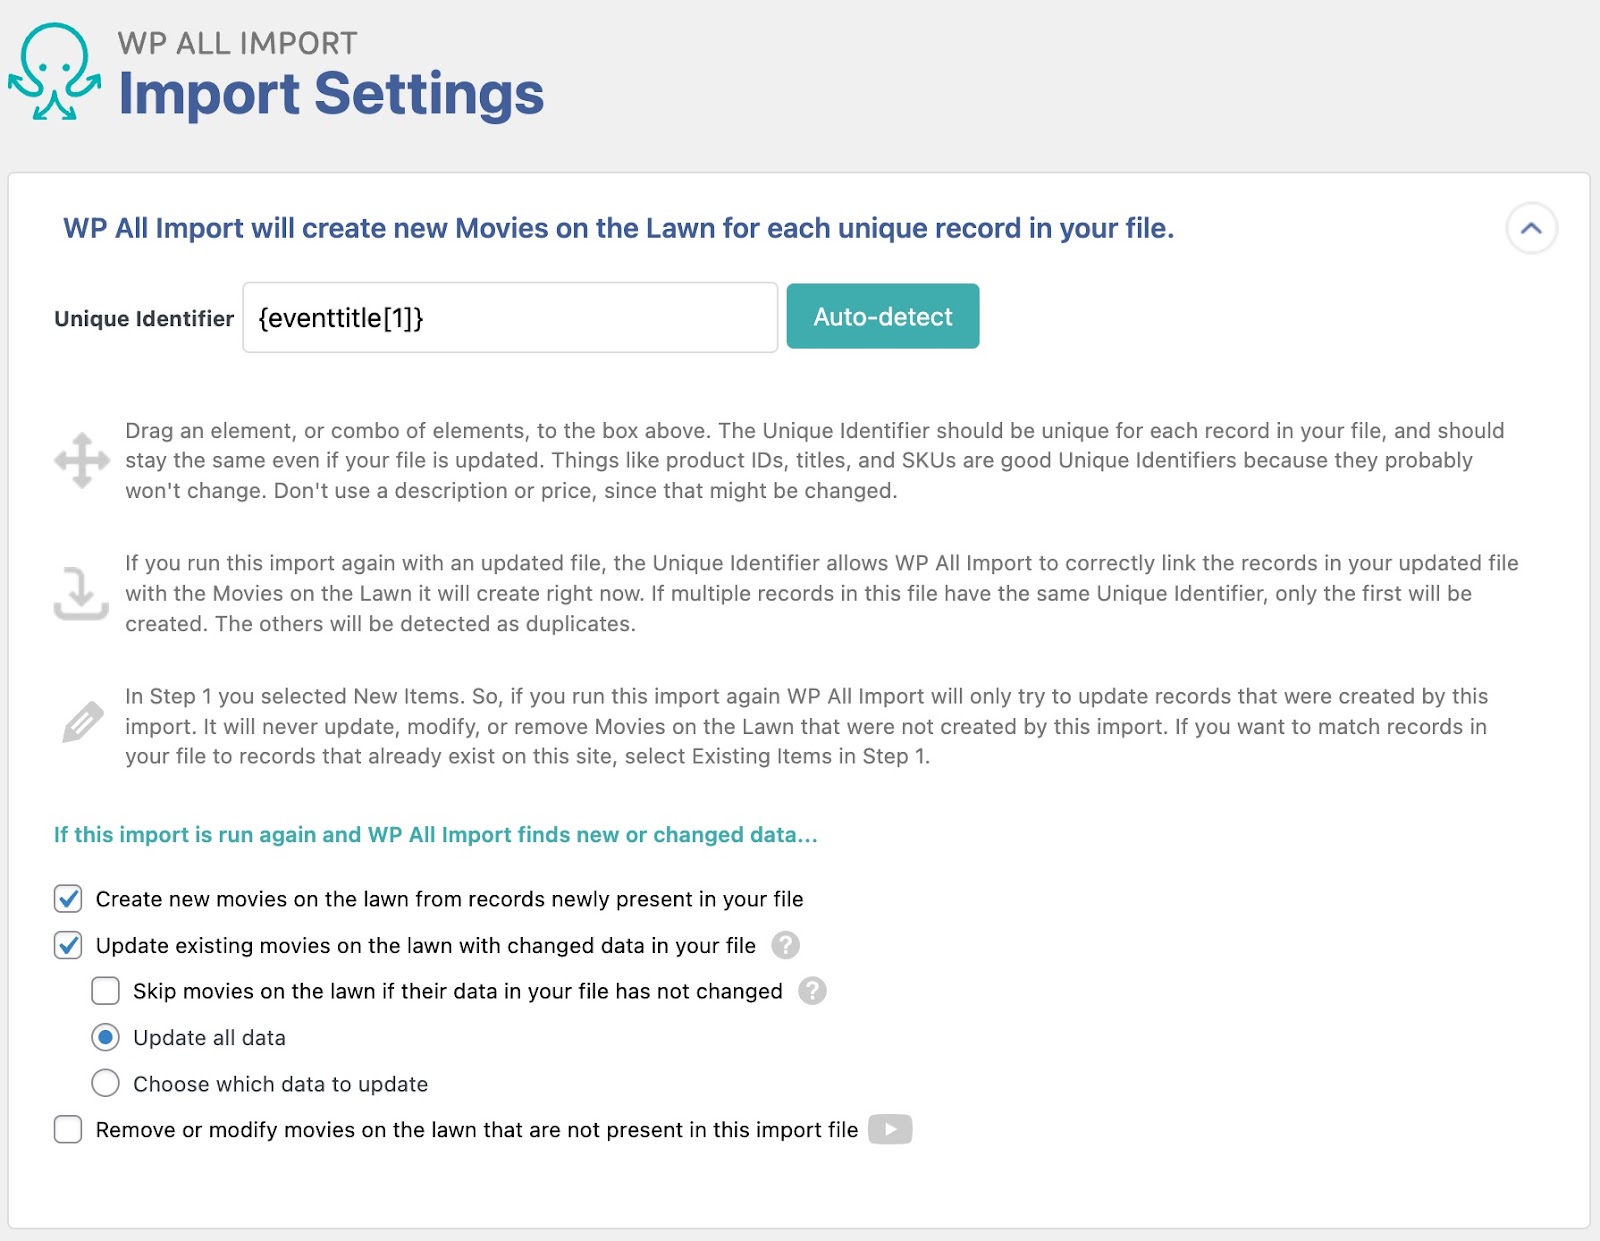
There are a lot of other things you can do here. For example, you can use the "Choose which data to update" option to choose exactly which data is updated when you re-run this import in the future. Or, if you're using the Pro version of WP All Import, you can set up a schedule to make the import run automatically. For this tutorial, though, we don't need to do any of that, we just need to click the "Continue" button at the bottom of the page.
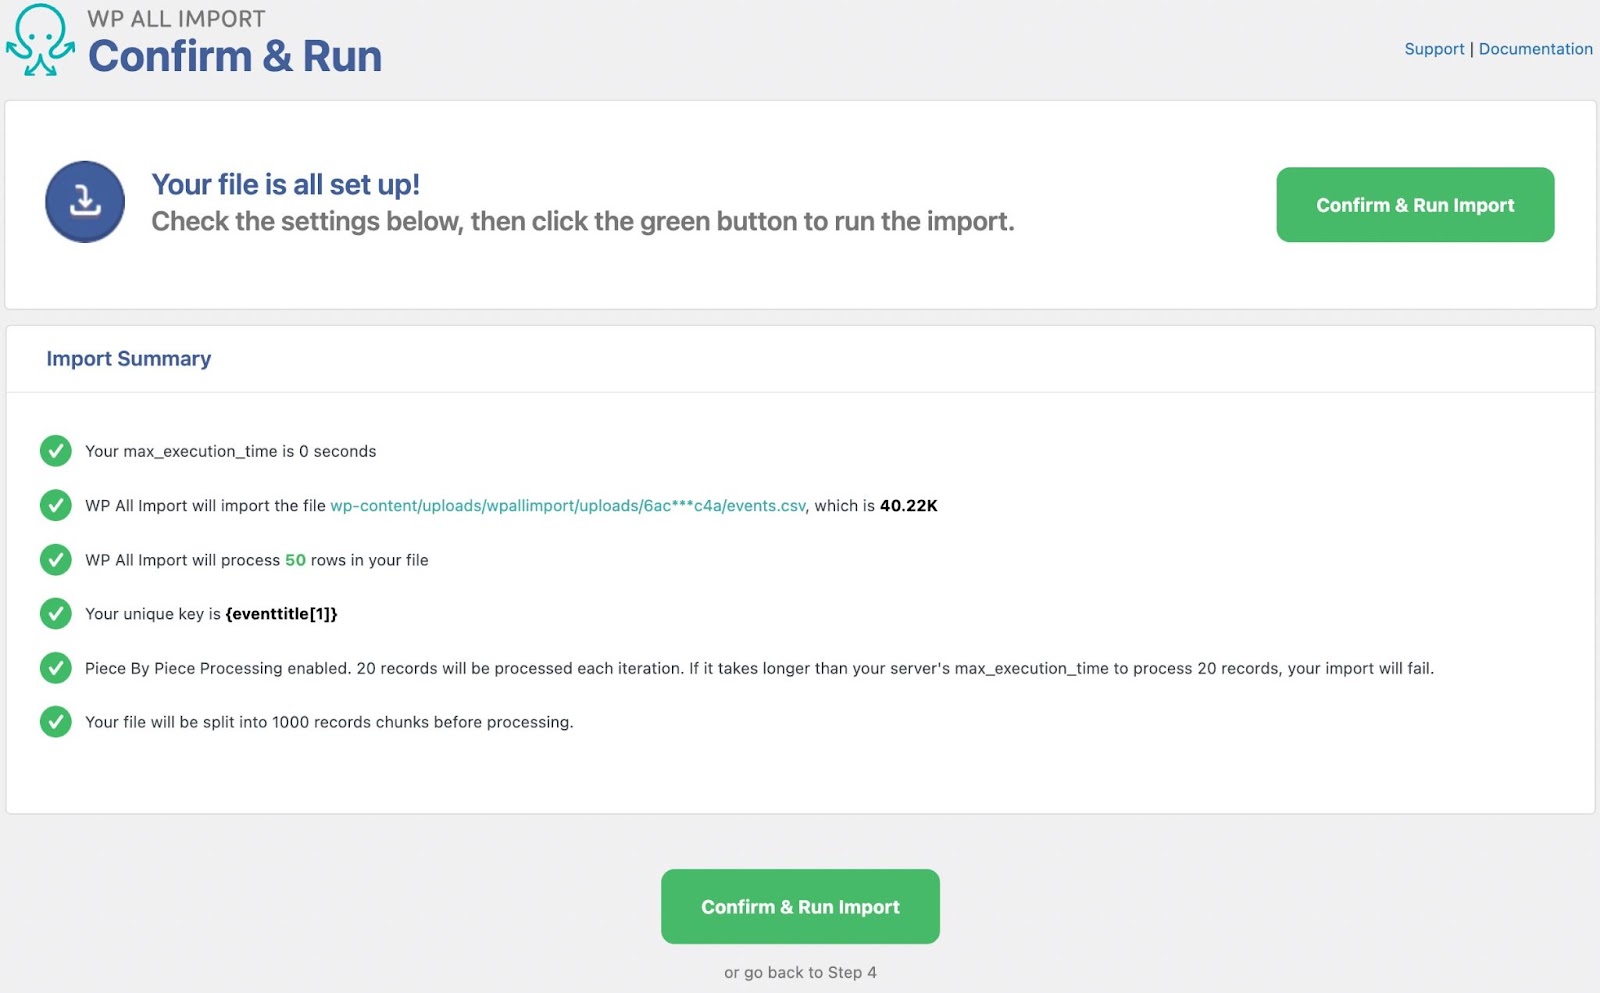
Confirm & Run Import
Here there will be a summary showing some of the import settings. We can just click "Confirm & Run" import here.
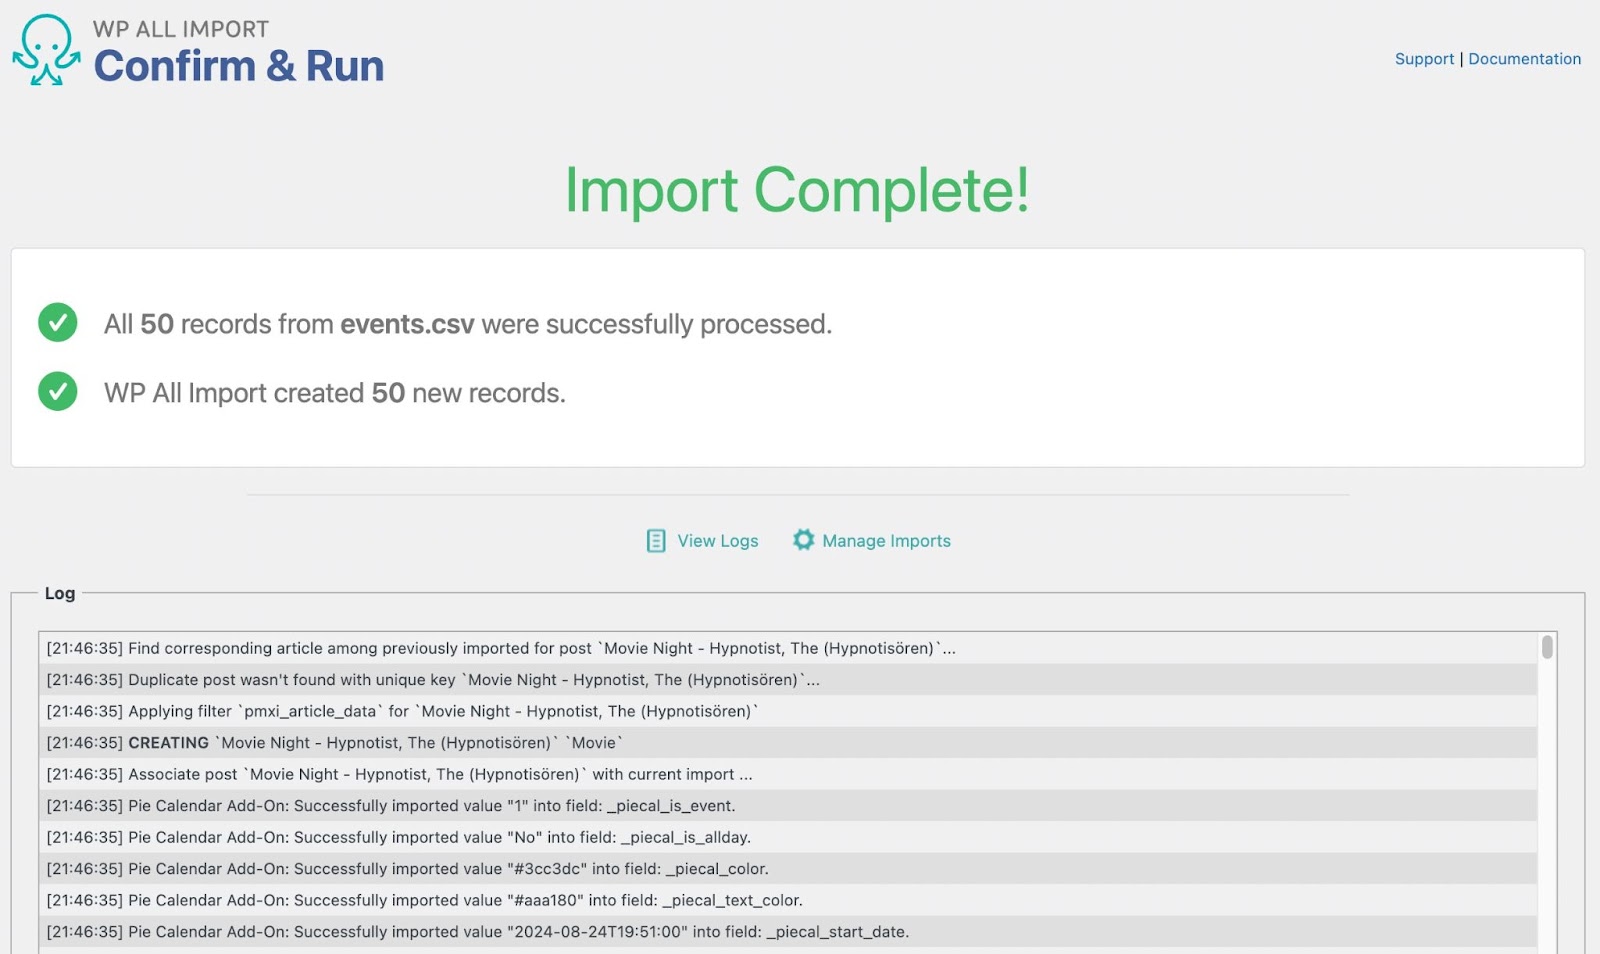
Then, wait for the import to run and show the complete page:
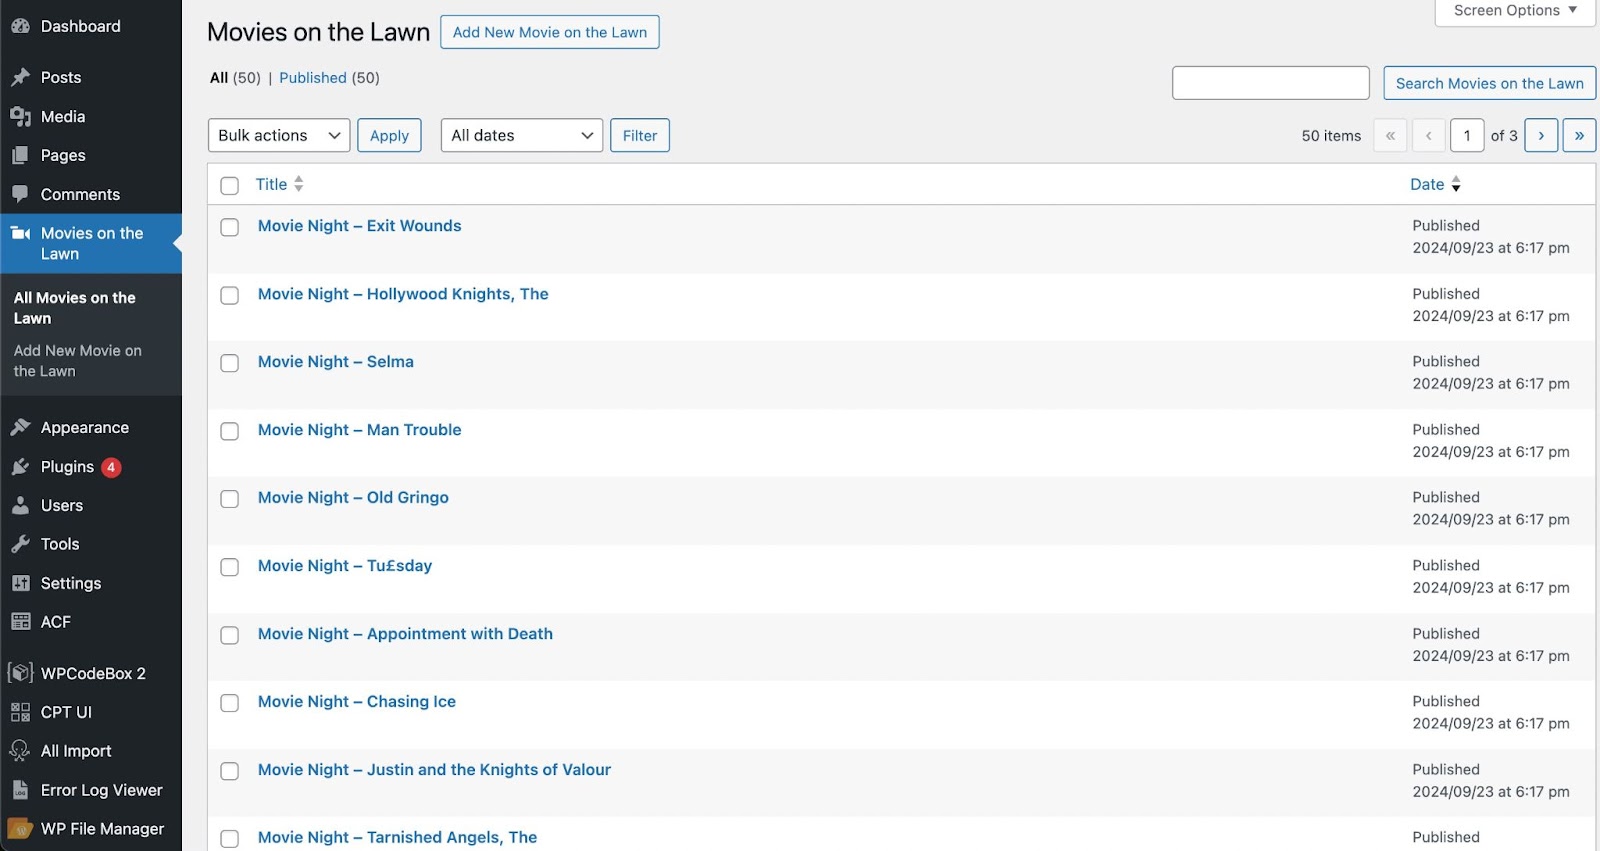
Finishing up
Now, we can view the posts in the "Movies on the Lawn" post type and we'll see all of the newly imported posts:
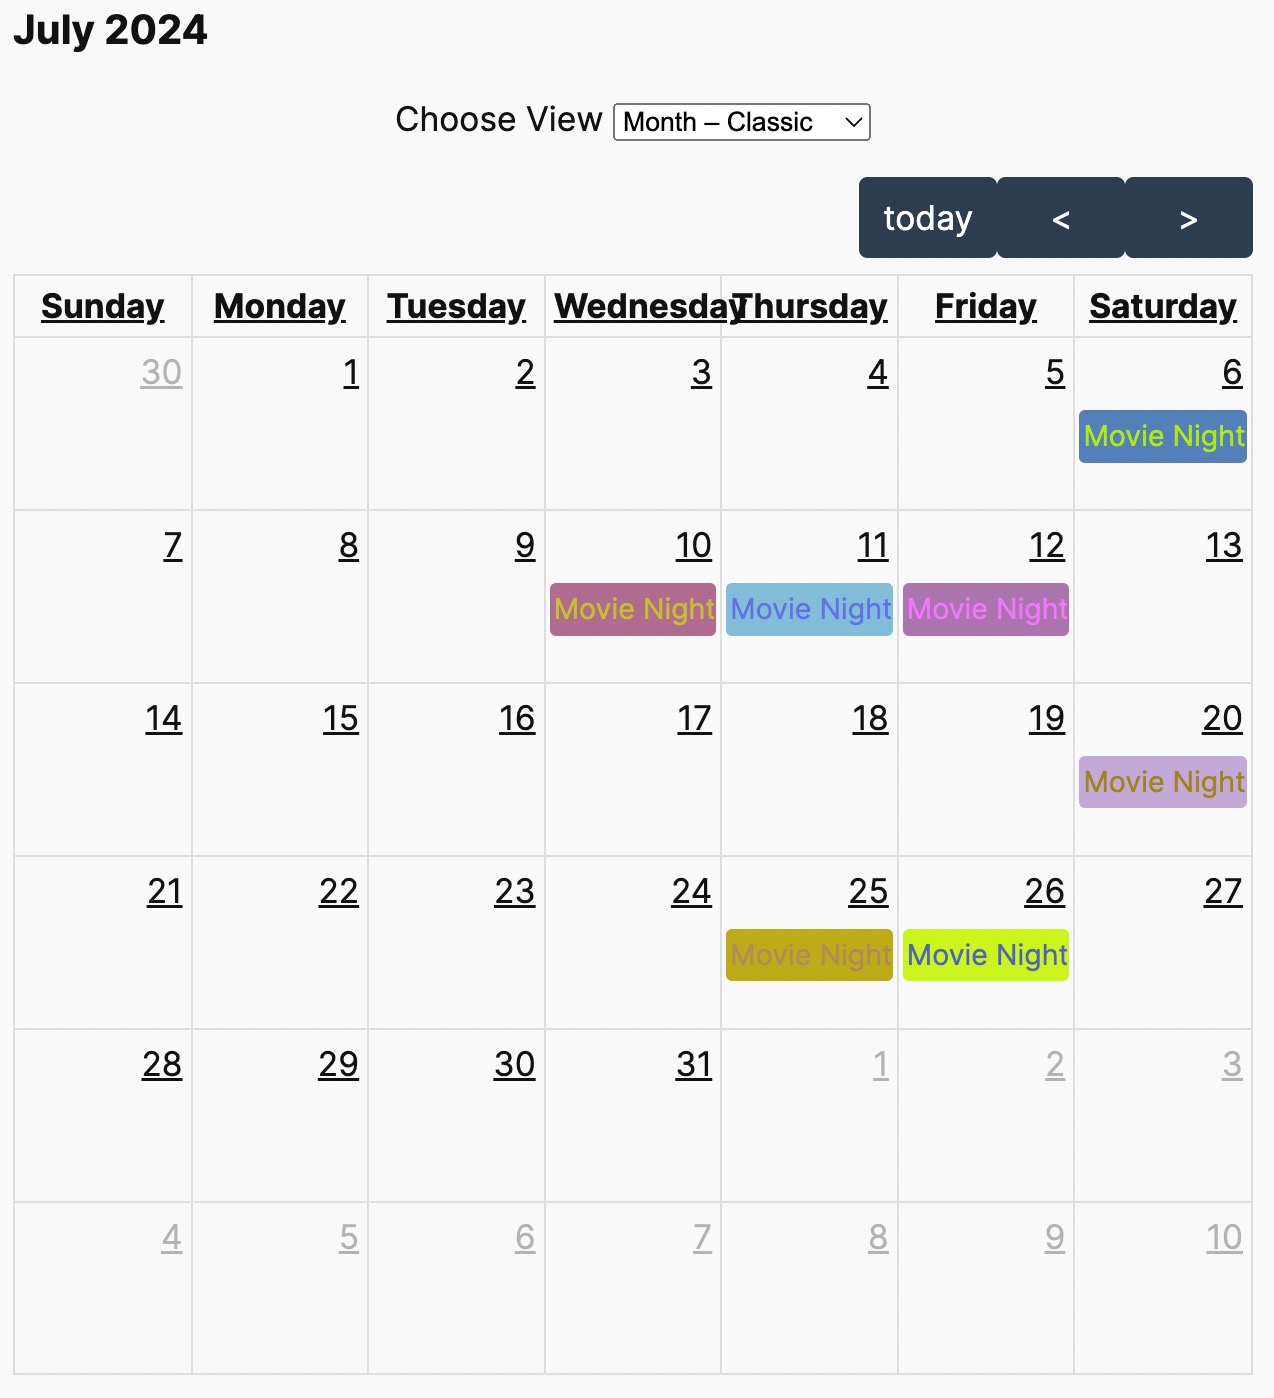
Next, we will create a page to list those posts in a calendar. Create a new page called whatever you want, then use this shortcode in the content (modify the slug if you used a different slug for your post type):
[piecal type="movie-on-the-lawn"]
Then, view the page on the front end, and you'll see your imported events:
For more information on how to use all of the features in WP All Import, please visit their documentation here: http://www.wpallimport.com/documentation/.